Here's my official CYA statement. Before you do anything at all with RTV Silicone, Casting Resin or any other hazardous chemicals be damn sure you have the correct protection and follow the correct safety procedures while handling the material. All chemicals you buy should have available safety precaution data sheets. I'd suggest reading them thoroughly and don't dare deviate from the recommendations. Playing roulette with your health isn't a good idea. Don't blame me if you splash casting resin in your eye and it hardens before you can say boo. I always work with protective goggles, full respirator, lots of paper towels on hand and a new pair of latex gloves. Don't get lazy and don't try to save a buck by cutting back on protective gear. If you seriously want to get into casting, you're going to be spending a few hundred bucks at least to get the proper equipment and RTV silicone will run you about 30 bucks for half a litre. (there's over one litre in the mold below)
Welcome to the making of "Jenna"
Jenna is the name I gave to the sculpture you'll see below in this step by step mold making process. If you're interested in sculpting and casting, this step-by-step will give you a great headstart on one way to go about it. When I created the mold for Jenna, I had already had the experience of using RTV silicone many times before. I've also got 3+ years of casting research under my belt. I'd suggest that my process here is not the final be all and end all of mold creation as you will need to do your own research and find out all you can before you start. Then once you've answered all your own questions you should try casting something you're not too attached to as a test. No amount of reading will take the place of honest-to-goodness experience. You're gonna break a few eggs before you're able to make a good omelet...as they say. Just don't rush it and break you're prize dodo bird eggs before you know what you're doing.
Well, This should really be called "The Casting of Jenna" As I didn't take any progress shots of the sculpting process on this one. (I promise I will take great in sculpting progress shots of the next one...)
Making the mold.
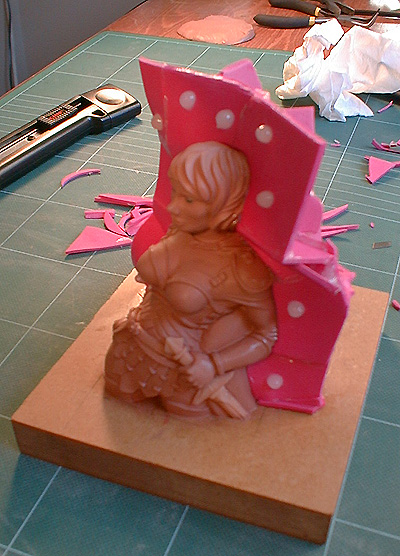 In this shot you'll see the first half mold support structure which I built from sheets of craft foam. The back is built up using a hotglue gun, and slowly but surely, pieces of foam have been added to completely isolate one half of the sculpture. I've placed glue pips on the side which will create keys to hold the mold halves together better. You'll see what I mean later on. In order to completely seal the parting line edge to prevent the mold material from leaking through to the back, when the support walls are complete I then carefully painted a layer of vaseline along the edge to plug up all the holes.
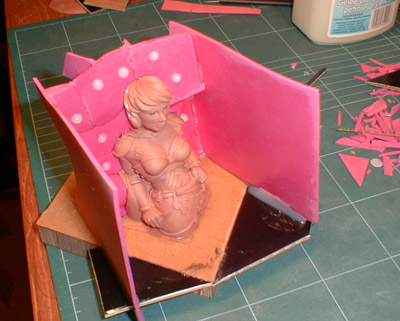 I've added the two side walls, Only the top wall to be attached then pouring starts below...
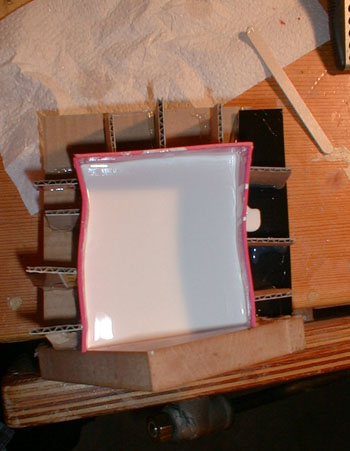
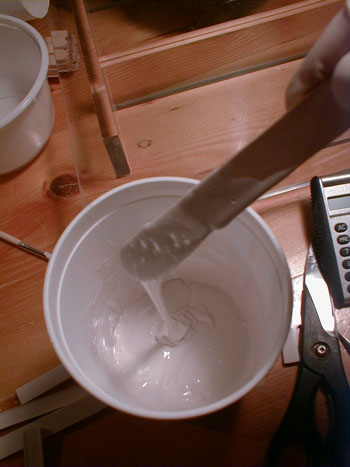 After the support structure is built to isolate half of the sculpture, I mix up a batch of RTV silicone. Catalyst is poured into the liquid RTV which will cause the silicone to set within 24 hours. Mixing introduces lots of air into the silicone as you can see from the image. After it is mixed thoroughly...
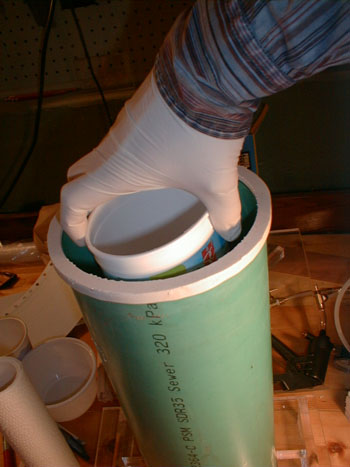
...I place the RTV into a vacuum chamber. Vacuuming it pulls the air bubbles out of the mixture leaving a clean and bubble-free batch of silicone ready for careful pouring.
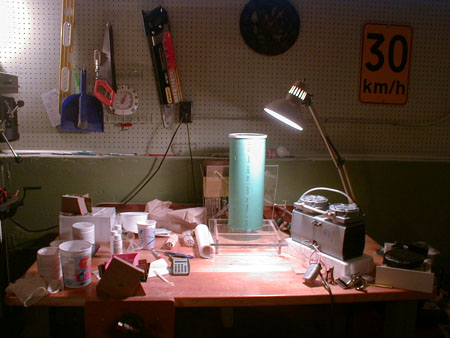
The Casting Station.
This is where I do all my casting. On a big table in a space that can get messy. In a well ventelated garage (I still use the respirator). See the road speed sign on the side? When casting, I follow it.... Work slowly and carefully and you'll screw up much less and save money. Vacuum chambe in the centre, vacuum pump to the right of that.
 I poured the first half of the mold in 2 stages. This first pour was done this way so that I could get a thin layer of silicone to seal any gaps which I might have missed along the edge of the figure. Even so, I discovered after that there was in-fact a thin gap through which silicone leaked. If I had poured the entire side at once, I would have lost a lot of silicone through that gap. The mold was left to set for 24 hours at this stage.
 This shows the second stage of the First pour. In order to avoid trapping air against the various surfaces of the sculpture, I pour the silicon into one corner of the foam "box" and allow it to VERY SLOWLY flow over the surface of the sculpture. If I was to carelessly just dump the whole batch of RTV into the box it would trap air which I do not want to happen.
 The First pour almost finished. The entire sculpture is now covered. I added more silicone after this shot to make sure that the final mold would be thick enough to hold its shape when casting.
 After the silicone sets for 24 hours I pull off the finely crafted foam "box" taking care not to damage the sculpture or cause the RTV to come away from the figure. I need it to stay exactly where it is in order to build the second half of the mold.
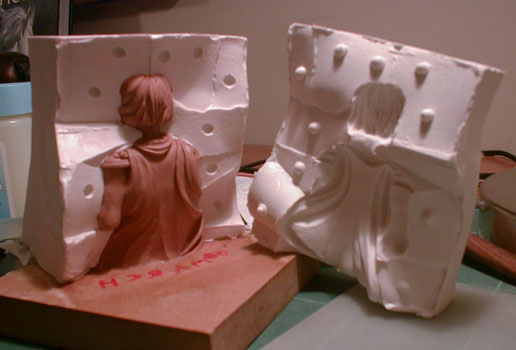
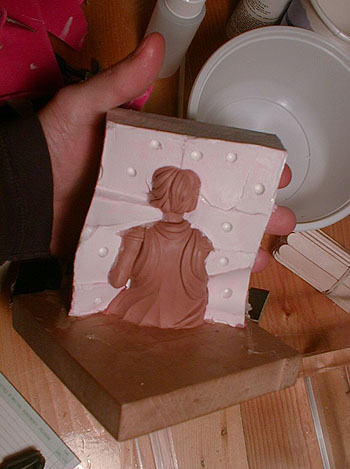 Here's the cleaned half mold...You can see the divots created by the hotglue pips added at the beginning.
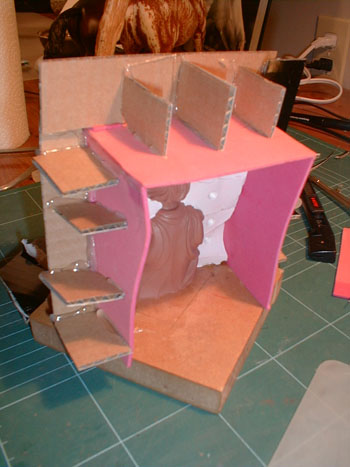 Fast forward a bit...I've built the walls for the second half of the mold. Reinforced with cardboard to keep it from coming away from the completed sides.
The most important step... I applied vaseline to the entire exposed surface of silicone. If this step is forgotten, the new silicone will CHEMICALLY BOND with the first side and you'll have a big block of silicone that you can't pull apart. That's bad. Very bad.
All set to pour.
I mixed up a new batch of RTV for this side going through the same vacuuming and pouring process as for the first side.
 Here's the final pour. Time to wait another 24 hours...
 After it's set, the box comes a way easily. We're left with a solid block with parting line along the side.
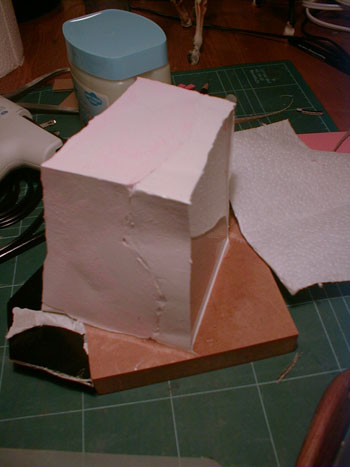
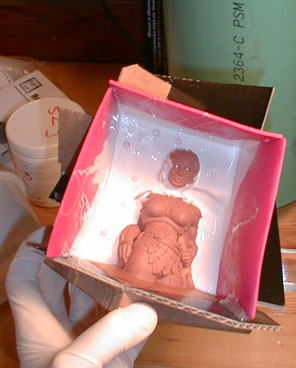
The cleaned up and completed mold with sculpture embedded inside.
 The moment of truth. The mold opened. The sides came away easily (because of the vaseline used as mold release) Looks clean, no bubbles and the sculpture looks to be intact!
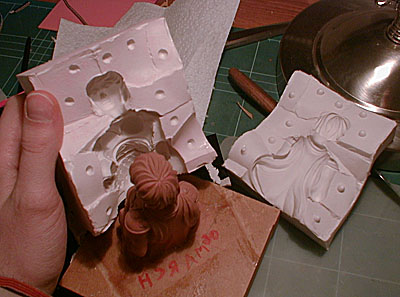 Carefully I pulled the front half of the mold off the sculpture. The silicone is extremely flexible and is great for casting sculptures with undercuts. It comes away without much complaining.
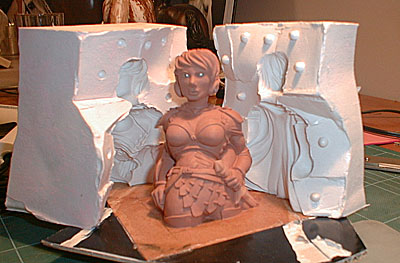 Here it is, the final shot. Clean mold ready for casting and an undamaged clay sculpture ready to be used to make a new mold if need be!
Hope you learned something.... about casting today!
Here's what it took me to to get to this point:
6 days of constructing, pouring and waiting!
3 years of research, buying equipment, building, testing and learning!
50 hours of sculpting!
Peace and Balance - and happy casting!
~The Art Ninja~
"You don't have to be great to get started, you do have to start to become great"